Using GetSign to send signatures automatically is a breeze! Just follow these easy-peasy steps:
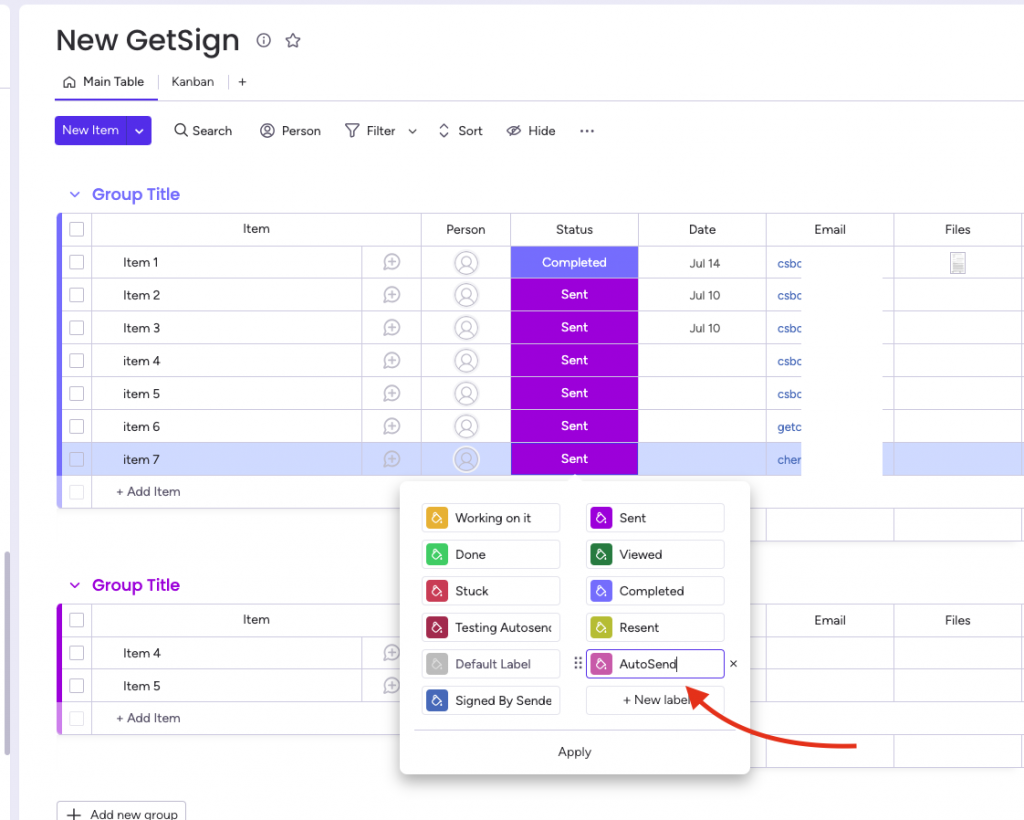
Step 1: Set Up a New Status Label
- On the board where you’re looking to implement GetSign, you can add a fresh status column or modify a current one.
- Introduce a distinct label for the auto-send feature, perhaps naming it “AutoSend.” After setting it up, remember to hit “Apply” to lock in your changes.
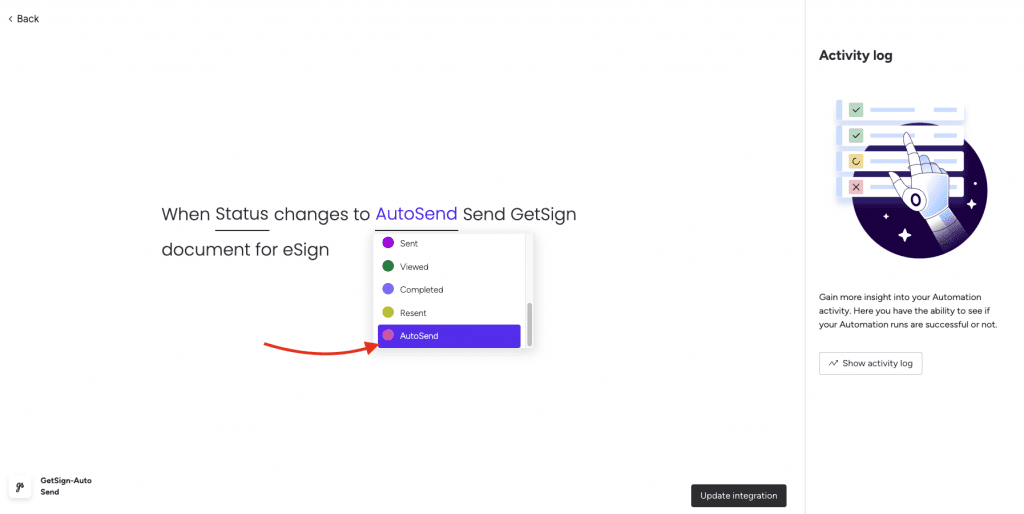
Step 2: Add the GetSign integration
- While you’re on the same board, navigate to the “Integrate” tab and tap on “Add New Integration.”
- Search for “GetSign Auto Send Integration” and then link it to the status column you crafted in Step 1.
- Choose the “AutoSend” label you’ve just created for this particular integration. After ensuring all looks good, press the “Add to Board” button to wrap up the integration process.
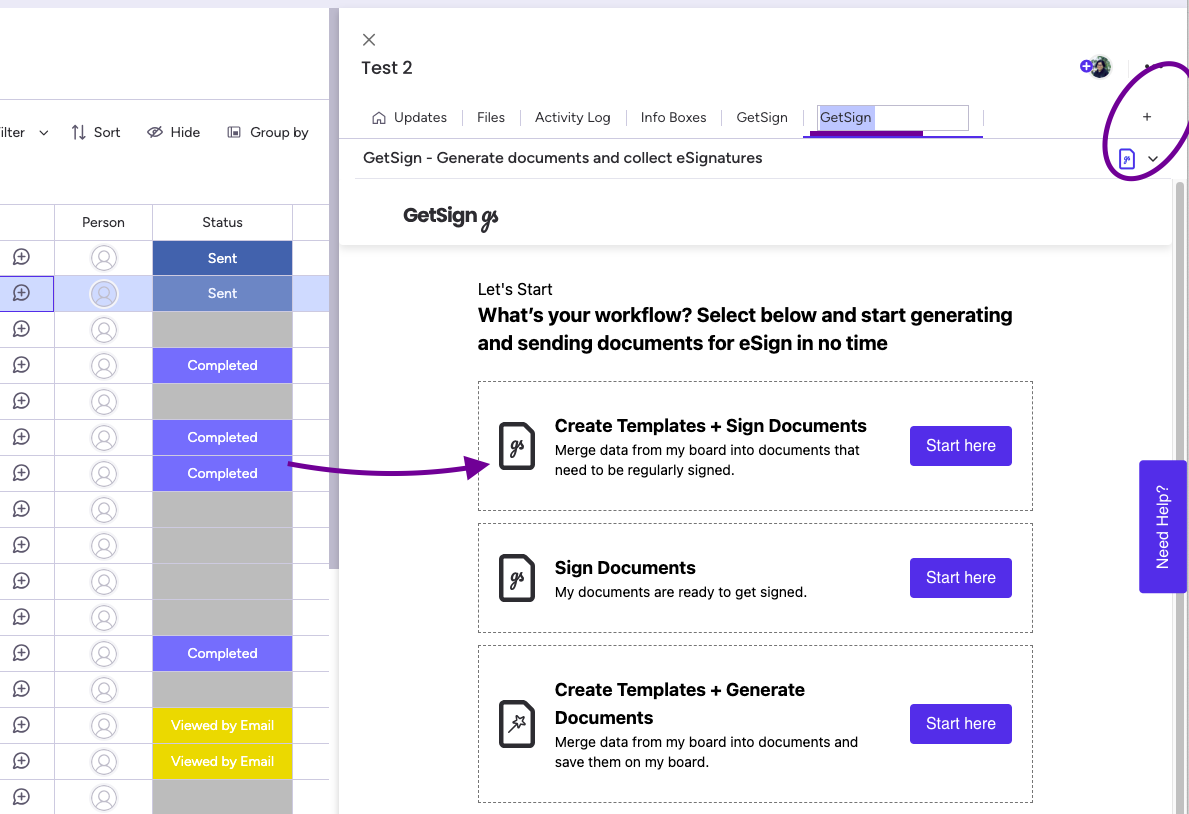
Step 3: How to automatically send signatures
- Navigate to the item view and click on the plus sign”+”.
- Then, search for GetSign. Choose “Create Templates + Sign Documents,” input your details, and designate signature fields as needed.
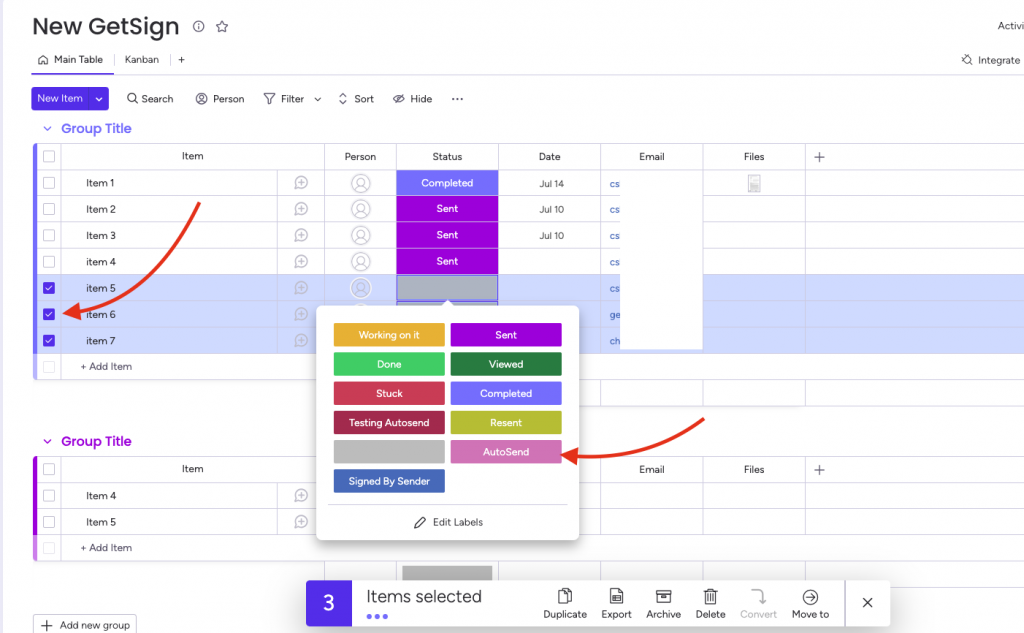
Step 4: How to automatically send signatures
- To dispatch signatures, just pick the items you wish to send and switch their status to “AutoSend.” From there, GetSign seamlessly handles everything, ensuring smooth and efficient signature processing.
By walking through these steps, you’ll effortlessly automate signature sending and fully leverage GetSign’s capabilities. Should any questions pop up or if you need extra help, just give a shout. Here’s to hassle-free signing!