Managing service level agreements (SLAs) can be challenging, especially when teams lack real-time visibility into their status. Without proper monitoring, tasks can slip through the cracks, leading to missed deadlines, breached SLAs, and dissatisfied clients. This reactive approach damages a business’s reputation and hinders operational efficiency.
Smart SLA Status Column revolutionizes SLA management by providing real-time monitoring and proactive alerts. It ensures your team stays ahead of potential breaches, enabling swift action to meet service commitments. With features designed to streamline operations and maintain excellence, you can uphold your reputation while improving efficiency.
Step 1: Install Smart SLA Status Column
Click the button below to install the Smart SLA Status Column
Step 2: Go to the Desired Board
Navigate to the board where you want to add the Smart SLA Status Column
Step 3: Add Smart SLA Status Column
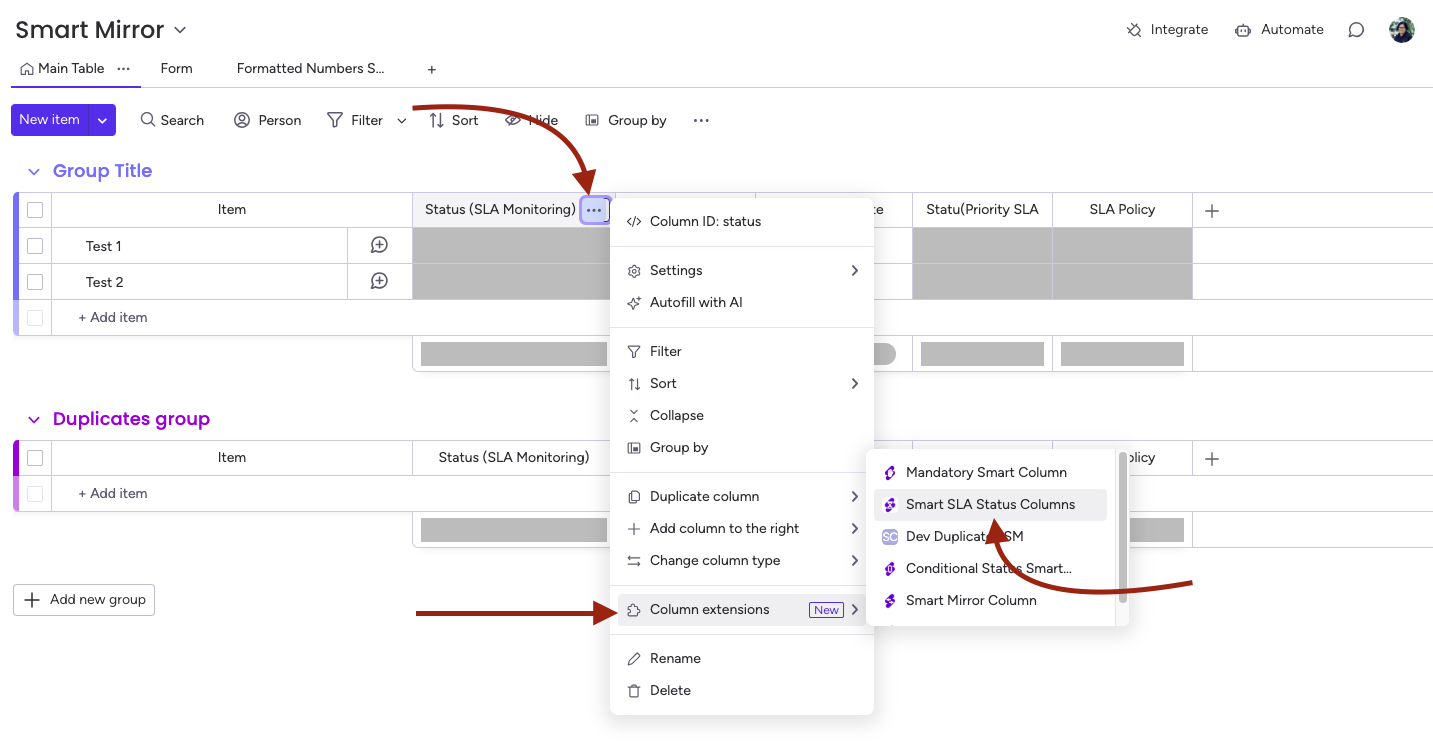
Select the column where you want the Smart SLA Status Column
Click the three dots (…) on the top right of the column header.
From the dropdown menu, choose Column Extensions.
Select the Smart SLA Status Column from the available options.
Step 4: Set the Smart SLA Status Column
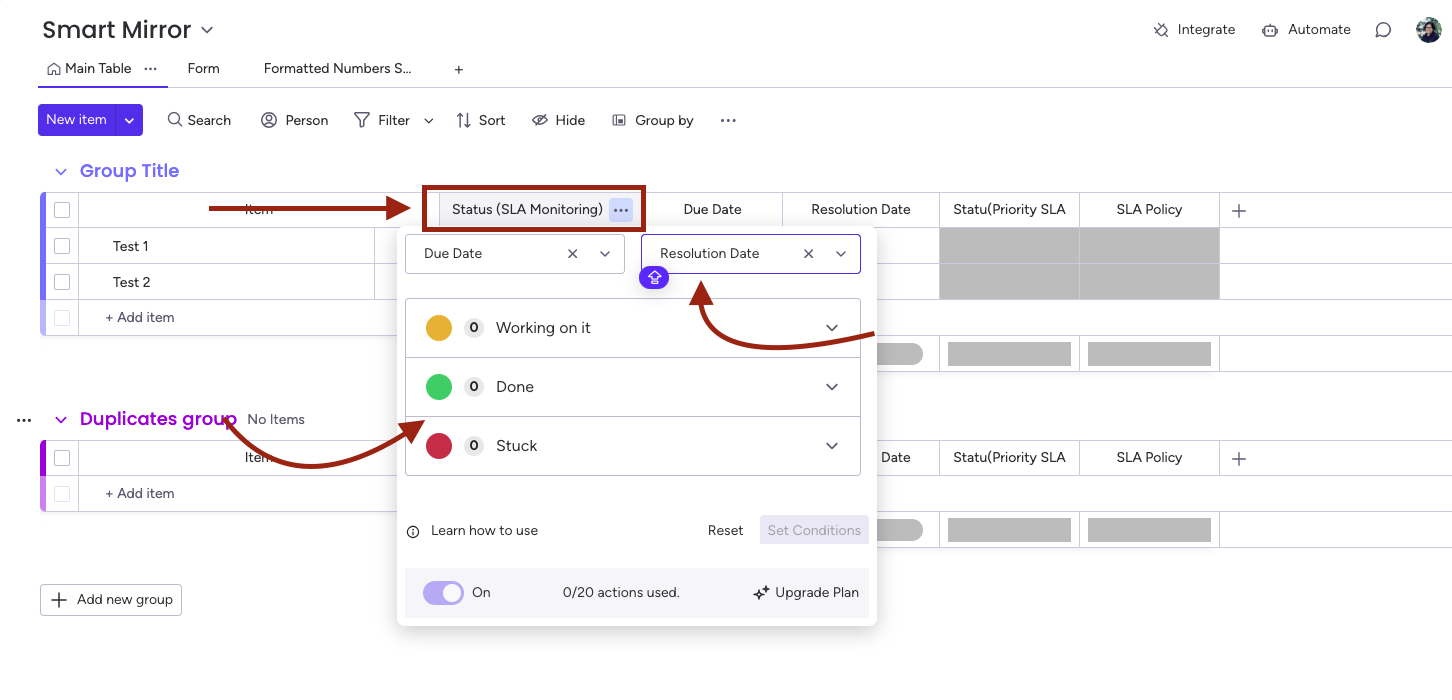
Select the status column to monitor your SLA
Step 5: Set the Smart SLA Status Column
Choose the Status Column
Select the status column to monitor your SLA. The labels in this column (e.g., In Progress, Completed, or Paused) will track the task’s progress and reflect its current state.
Configure SLA Policies
With the status column selected, define the SLA policies for each label. Assign case types, such as High Priority, Medium Priority, or Low Priority, and configure the resolution timeframe for each.
For example, High Priority cases might require resolution within 24 hours, while Low Priority cases might allow up to 72 hours.
Map each status label to its respective SLA type to ensure accurate tracking and compliance.
Due Date Creation
The app will automatically calculate and populate the due date column based on the SLA policy assigned to each task or status label.
Resolution Tracking
When a task is marked as resolved or closed, the resolution date will automatically be recorded in the designated resolution date column.
Time to Resolution
Set up triggers to calculate and track the time taken to resolve a task based on its SLA type. This metric can be measured in days, hours, or minutes, depending on your configuration.
Notifications for Breaches
Create triggers to notify the assigned person (from the people column) when resolution times approach or exceed the SLA threshold. Notifications can include details like the task name and remaining time to meet the SLA.
Status Change Notifications
Enable a trigger to send alerts when the task status changes. Notifications will update team members on tasks that are paused, restarted, or completed, ensuring everyone stays informed.
Step 6: Save Your Settings
Once you’ve configured your preferences, click the Save button to apply the changes.
By following these steps, you can seamlessly monitor and enforce SLA policies, ensuring tasks are resolved efficiently and within defined timeframes.