How to use Smart Columns to enforce conditional logic to monday.com board status columns
Managing phone numbers on Monday.com can be challenging when incorrect or invalid data is entered, leading to communication breakdowns and inefficiencies. Without a reliable way to verify phone numbers, teams may spend valuable time correcting errors or chasing down missing information.
The solution? Phone Number Validation—the ultimate tool for ensuring the accuracy of any phone number stored in your Monday.com phone board column. This feature automatically validates phone numbers, minimizing errors, and ensuring your contact information is always accurate and reliable.
By integrating this solution into your workflow, you can save time, improve communication, and enhance overall efficiency. Say goodbye to invalid entries and hello to seamless data management with Phone Number Validation!
Step 1: Install Conditional Status Smart Columns
Click the button below to install the Conditional Status Smart Columns
Navigate to the board where you want to add the Conditional Status Smart Columns
Step 3: Add Conditional Status Smart Columns
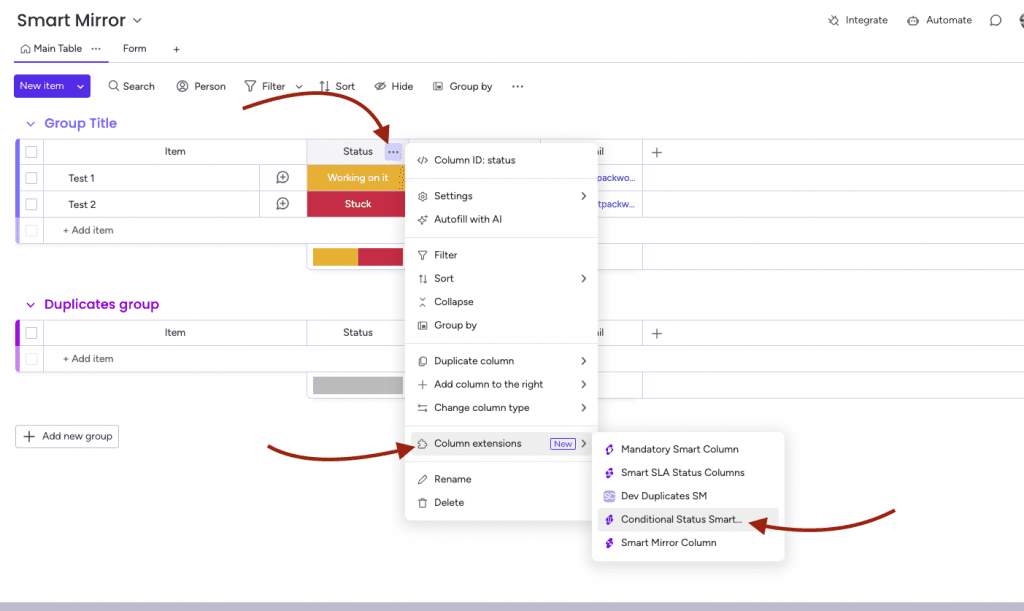
Select the column where you want the Conditional Status Smart Columns
Click the three dots (…) on the top right of the column header.
From the dropdown menu, choose Column Extensions.
Select the Conditional Status Smart Columns from the available options.
Step 4: Set the condition on each status label
Each status label is assigned predefined conditions based on your specific goals.
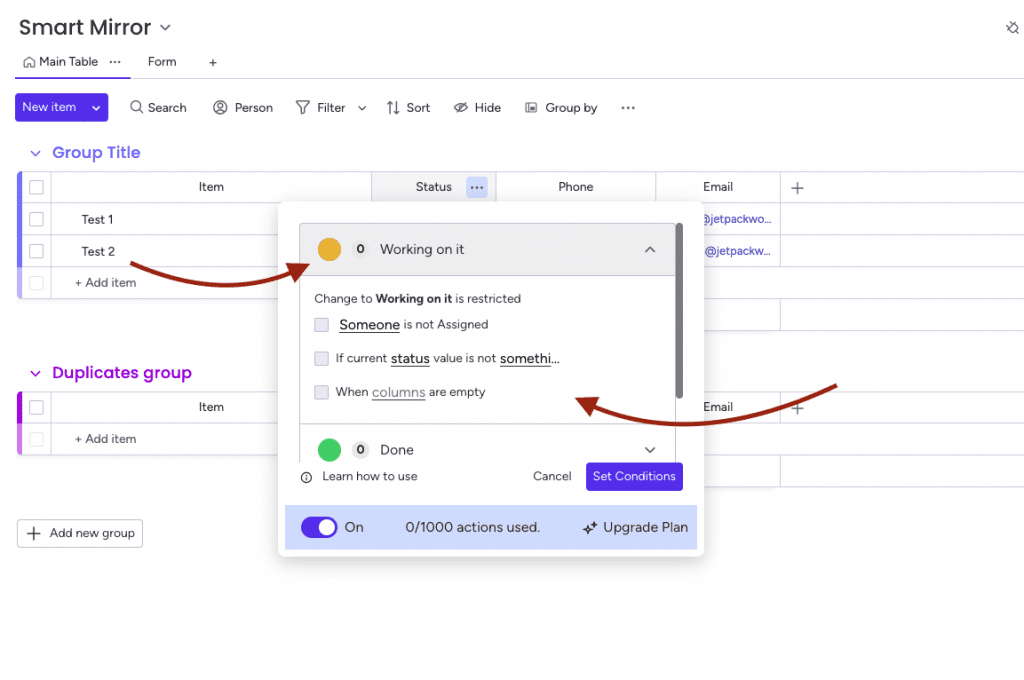
Step 5: Set the Conditional Status Column Trigger
Change to status is restricted
Someone is Not Assigned: The conditional status will activate if no person is assigned.
If the Current Status Value Is Not Set: The condition triggers when the selected status value does not meet the defined criteria.
When Columns Are Empty: The condition activates if specific columns are left blank.
Step 6: Save Your Settings
Once you’ve configured your preferences, click the Save button to apply the changes. This feature offers the ultimate solution for applying and enforcing conditional logic to your Monday.com board status columns, ensuring consistency and significantly reducing process errors. Streamline your workflows and enhance accuracy with ease!