Here’s a tutorial on how to install VLookup 2.0 on Monday.com:
→Install VLookup
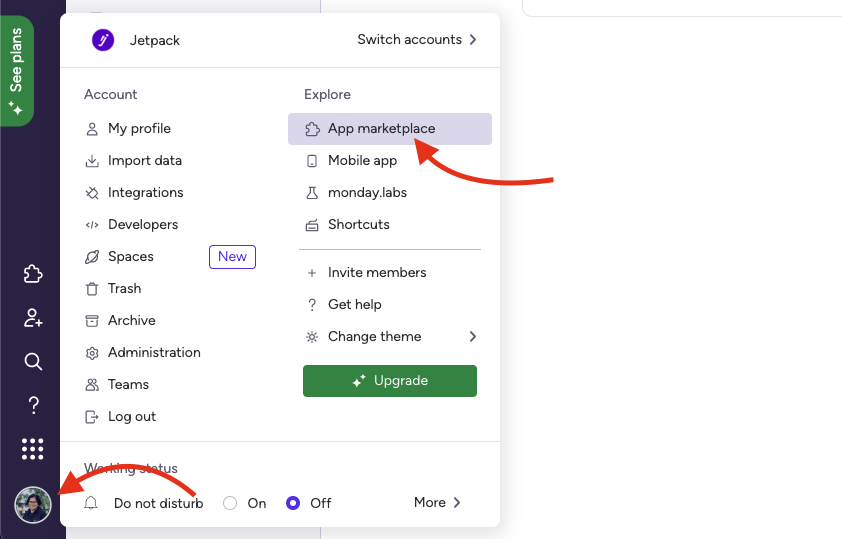
1. Open your Monday.com account and navigate to your workspace.
2. Click the “App Marketplace” section in the left sidebar.
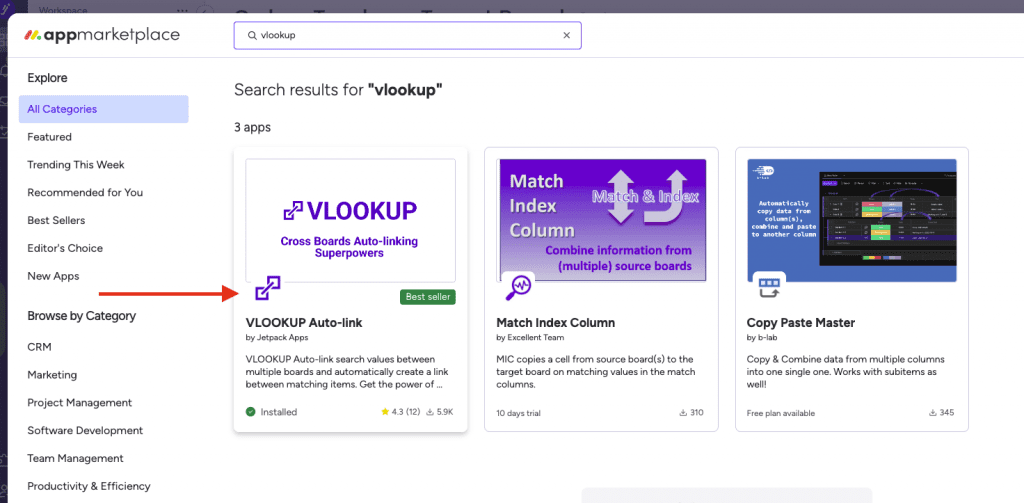
3. In the search bar at the top, type “VLookup” and press Enter.
4. Locate the VLookup app in the search results and click on it to open the app details page.
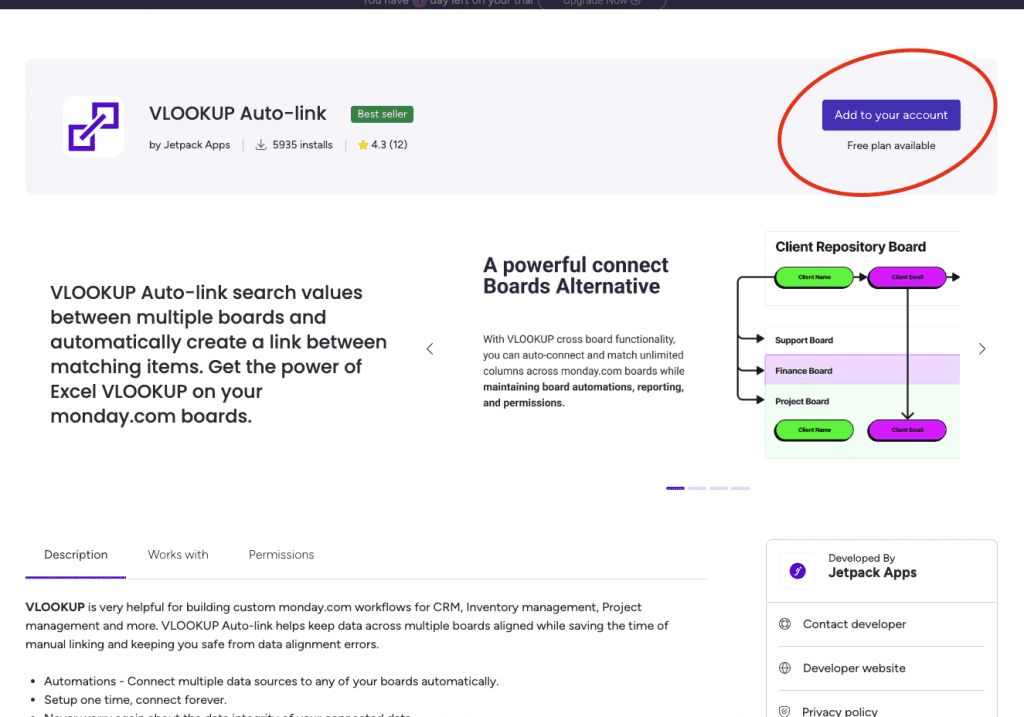
5. On the app details page, you will see information about the VLookup app, including its description and features.
6. Click the “Add to Account” button to start the installation process.
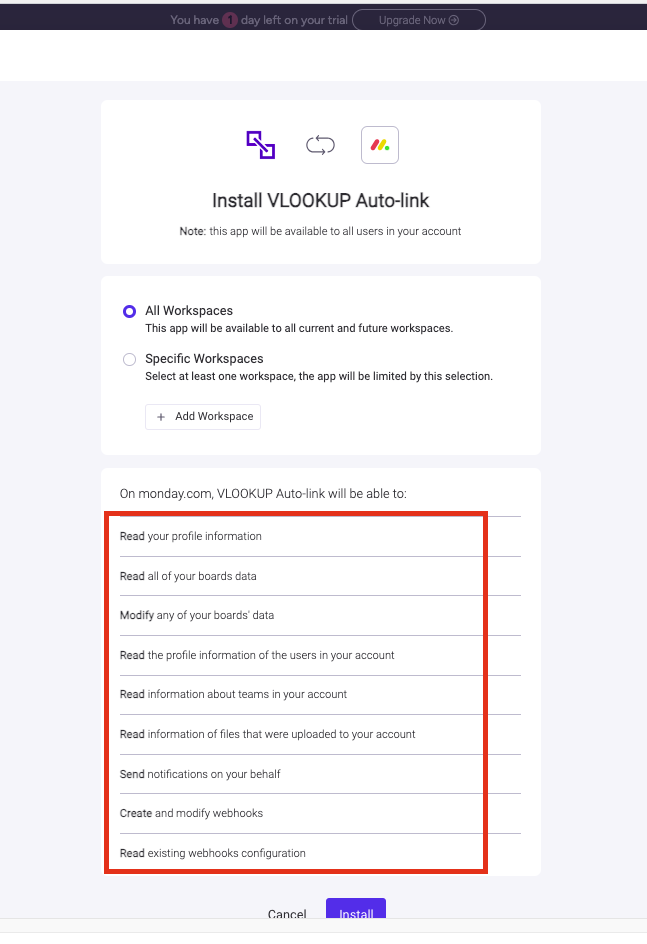
7. A pop-up window will appear, asking you to confirm the installation. Review the requested permissions and click on the “Install” button.
Below highlighted in red, are important for the proper functioning of VLookup.
8. Once the installation is complete, you will see a confirmation message indicating that the VLookup app has been successfully installed.
→Install VLookup Board View
To install the VLookup Dashboard view on a Monday.com board:
- Open the board where you want to use VLookup.
- Click the + button > Select Apps.
- Search for and click the VLookup Dashboard view.

2. Use the VLookup dashboard to set up your recipe. This is where you can establish connections between columns and determine which triggers you’d like based on desired actions.

→Create Board Connection
Let’s establish a connection between your boards’ data. Begin by selecting your source board and target board, as well as a unique key value that will serve as a matching criterion between the items on these boards.
Source Board: This board contains the data you wish to link to the target board.
Target Board: This is the board where you want data to auto-populate when the specified auto-link conditions are met.
Key Source Value and Key Target Value: The key value you choose must be unique. When the Key Source Value matches the Key Target Value, it will trigger the auto-linking process and populate the linked column data.
Conditions: You have the option to incorporate conditions into your linked columns. For example, you can specify that when specific status or label criteria are met, VLookup will initiate the linking process.
Force Update: Enabling this option will compel the source and target columns to link when the key value is matched.
1. Press the “Create Auto Link” button to start crafting your recipe.
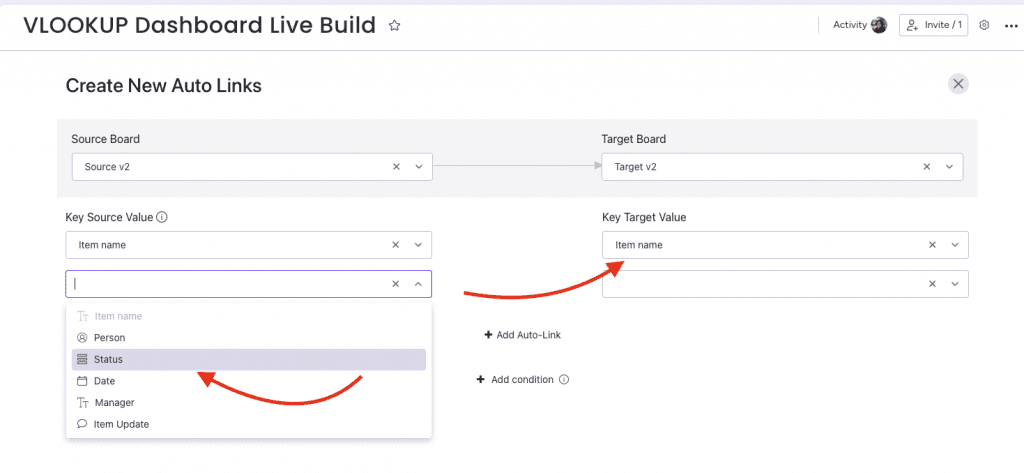
- Choose the board you want to connect with.
- Pick your Source Key Column and Target Key Column. These will serve as unique identifiers to match items on another board.
- Define the columns you aim to connect.
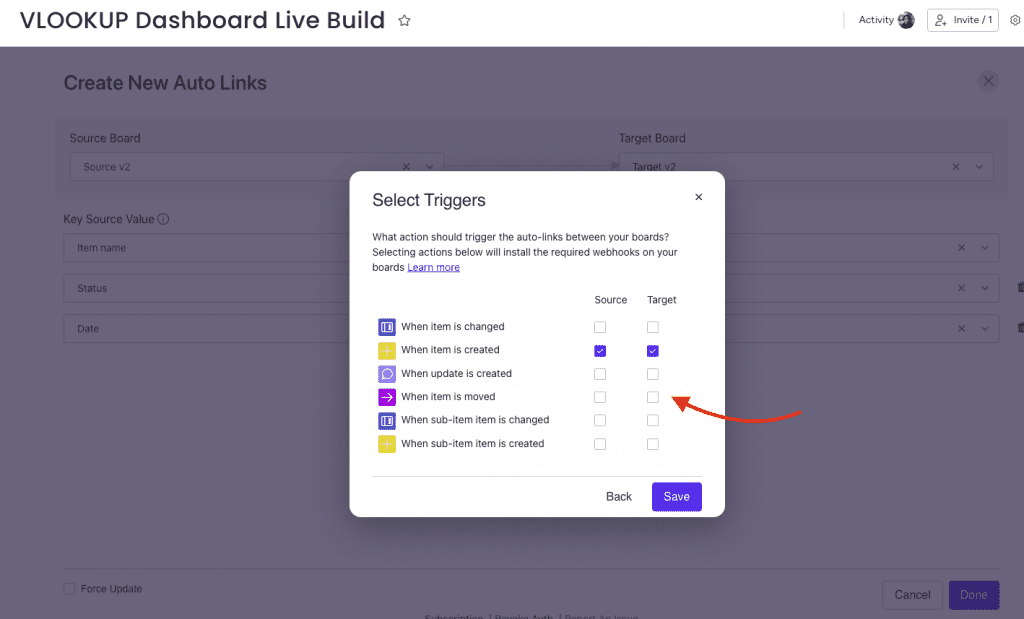
4. After setting up, click “Done”. A pop-up will emerge, guiding you to set up action triggers. Familiarize yourself with triggers here.
5. After understanding triggers, select the most appropriate ones for your needs and press the “Save” button.
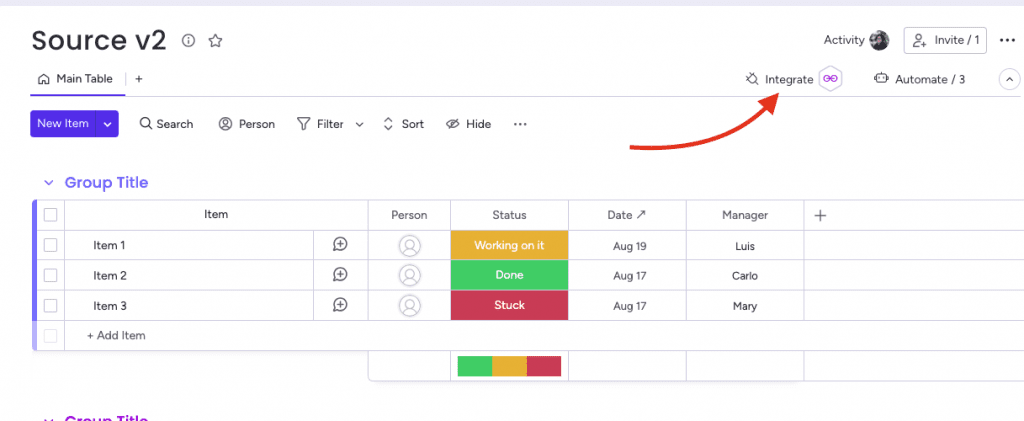
6. The system will automatically embed all required VLookup triggers into the selected board as webhooks. These can be viewed in the Integration center.
Congratulations! Your team is now poised to operate more efficiently than ever before.