Transitioning away from Op.Sign? Look no more, GetSign enables you to effortlessly retrieve a document and dispatch it without the need for manual processing.
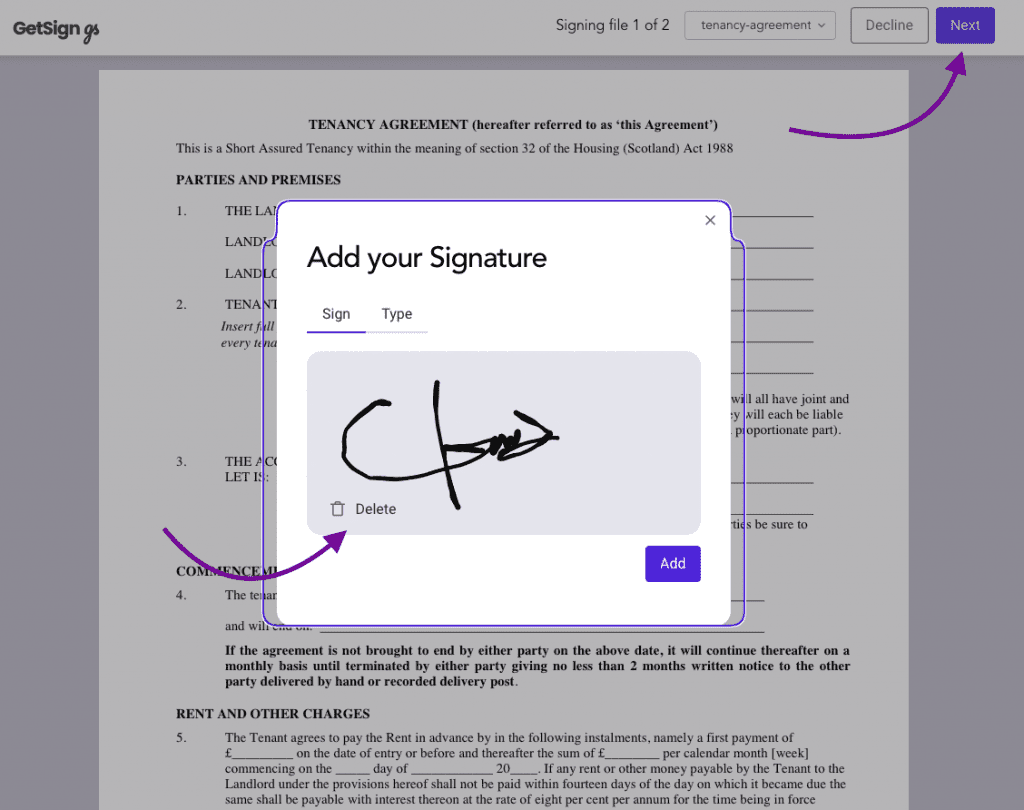
GetSign recent addition “Auto Sign Anywhere,” completely transformed how users sign documents. This new addition makes signing documents incredibly simple and convenient. Now, users aren’t restricted to signing in specific spots; they can effortlessly sign documents with just a tap anywhere on the page.
No more tedious scrolling to locate the signature line or dealing with resizing signatures to fit into predefined boxes. GetSign’s “Auto Sign Anywhere” feature frees users from these constraints, providing unmatched flexibility and efficiency in the signing experience.
Step 1 – Create the necessary columns
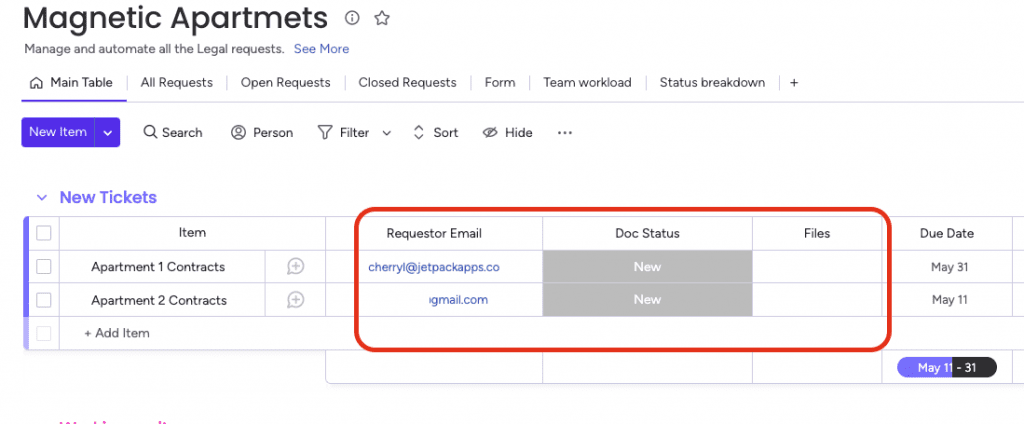
- Navigate to the board view and click on the “+” button to create new columns for your board. Consider adding columns for “status,” “email,” and “files.”
Reminder:
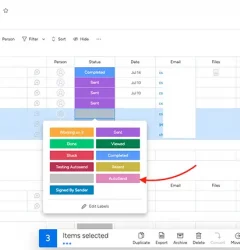
At the start, default statuses are available. As you move along the different stages of signing, different statuses will be loaded. A full list of statuses will be fully loaded once you complete the signing process.
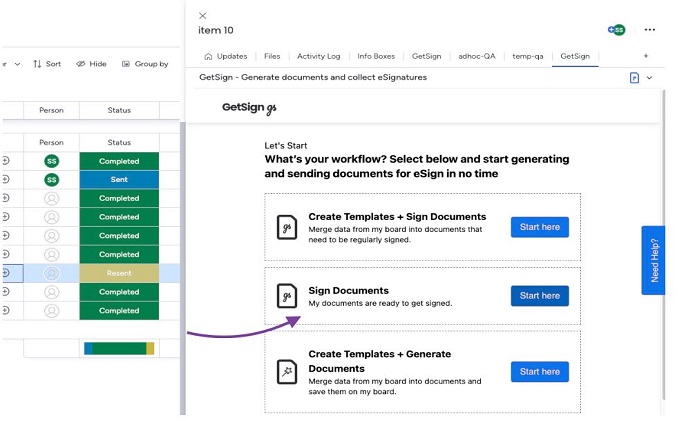
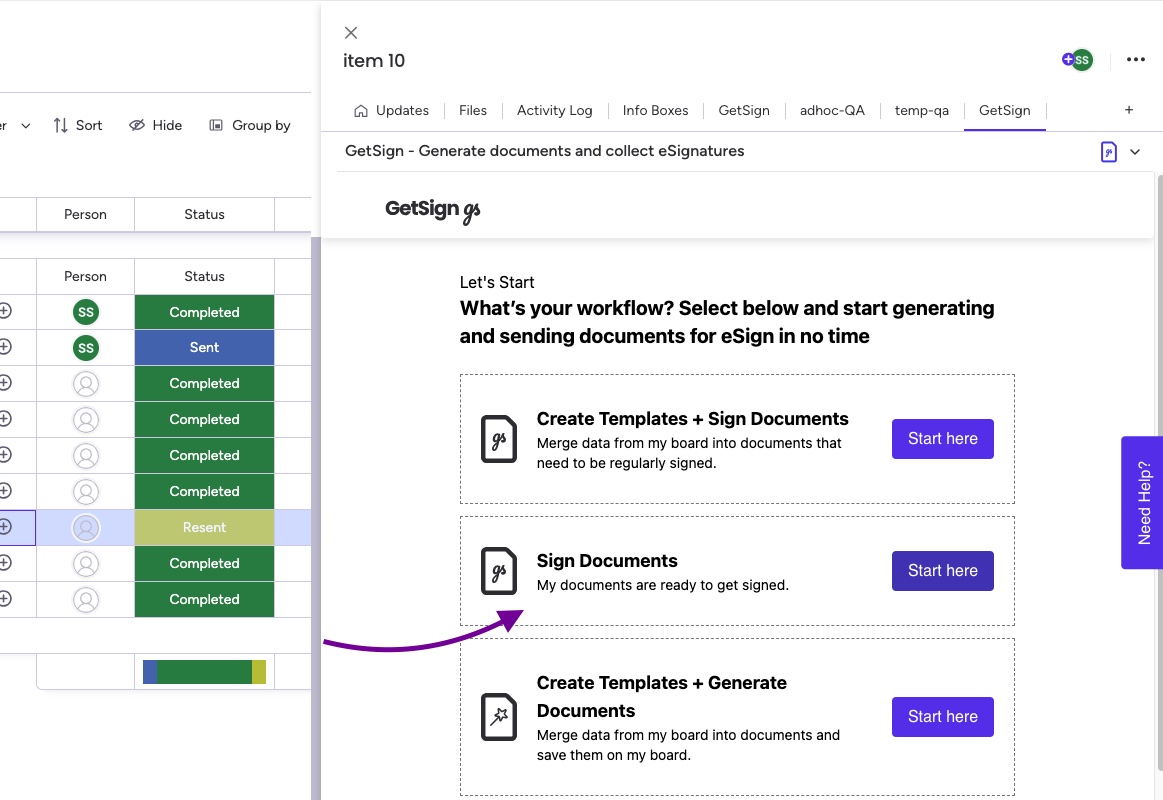
Step 2 – Select a Workflow
- Click on any existing item or create a new item.
- Click on the “+” button to add a view and select GetSign.
- Select “Sign Documents” workflow
You can only access the Enable Auto Sign Anywhere feature through the “Sign Documents” workflow.
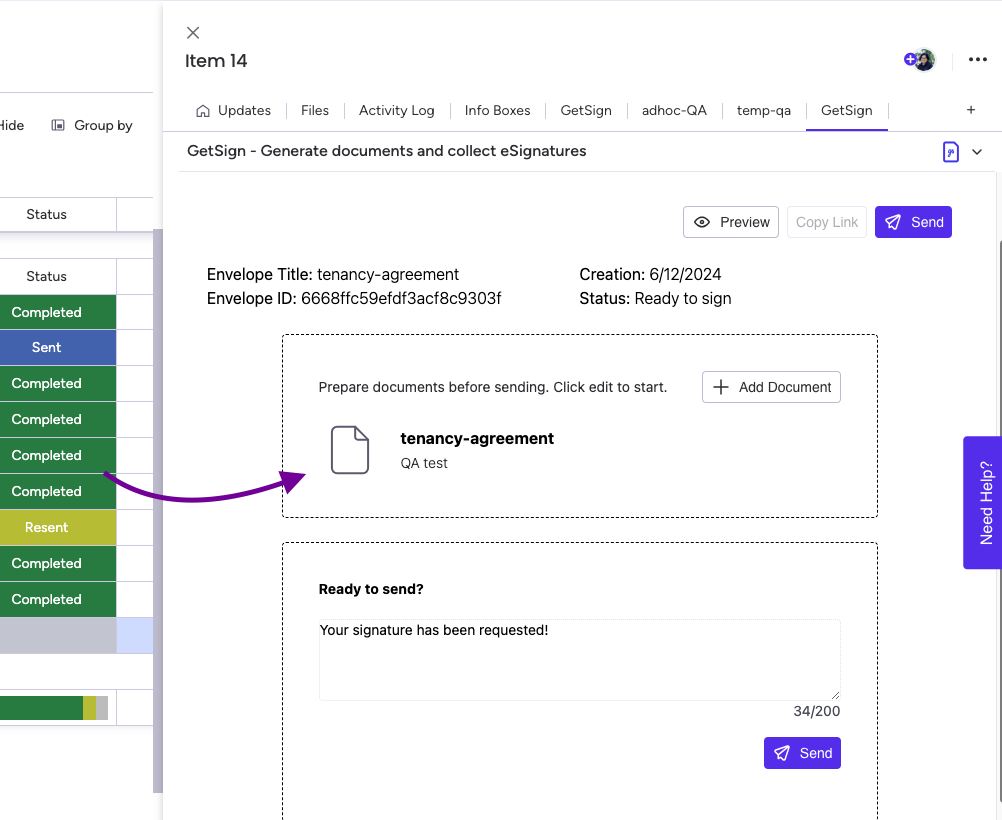
Step 3 – Uploading a document
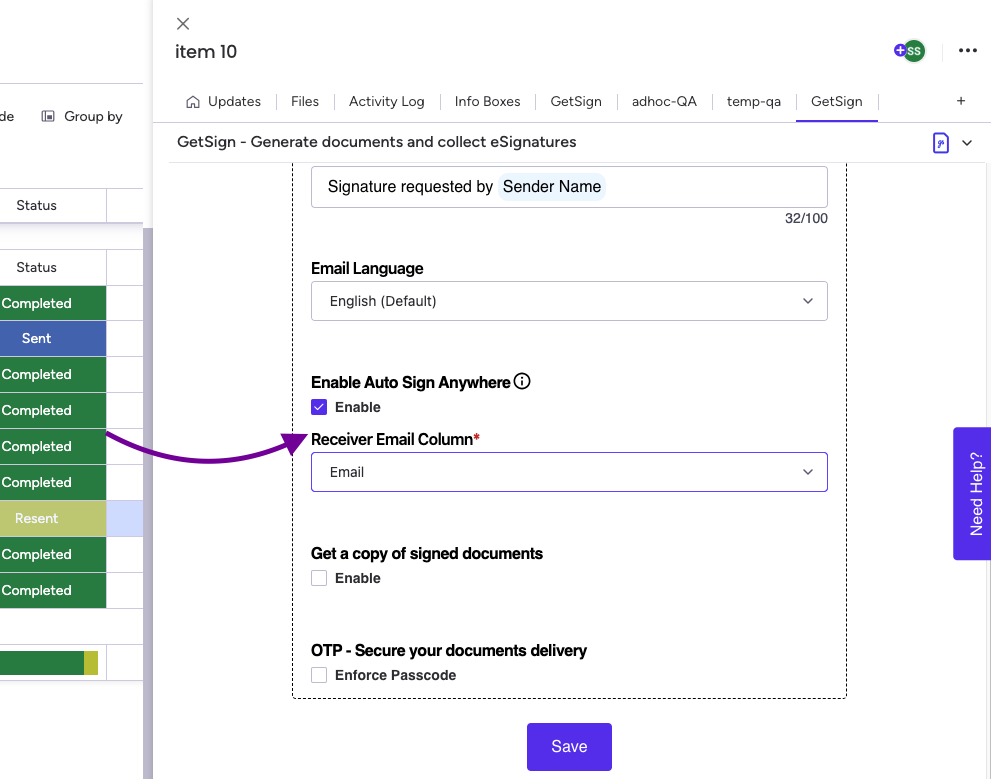
- Go to the item view and select the “GetSign” tab.
- On the “GetSign” tab, you will see a list of columns. You can map each column to the corresponding board column you created in Step 1.
- You need to check “Enable Auto Sign Anywhere” to activate this feature and select the Receiver Email column.
- Once you have mapped all the columns, click the “Save” button to save your changes.
Step 4 – Verify your email
- Prior to sending your documents, it’s essential to verify your email address to prevent your emails from being flagged as spam.
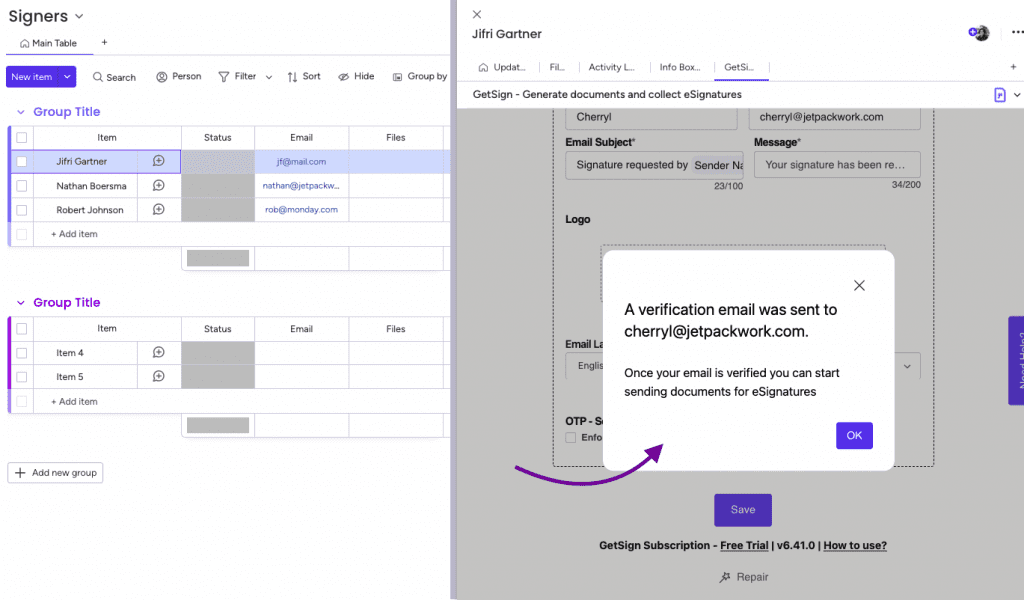
- Next, head to your email inbox and complete the email verification process.

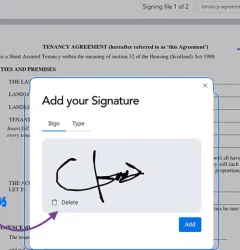
Step 5 – sending document to the recipient
- You can now send the document to the receiver by clicking “Send” button.
 Note that the receiver email is defined in the email column of the board that you have mapped.
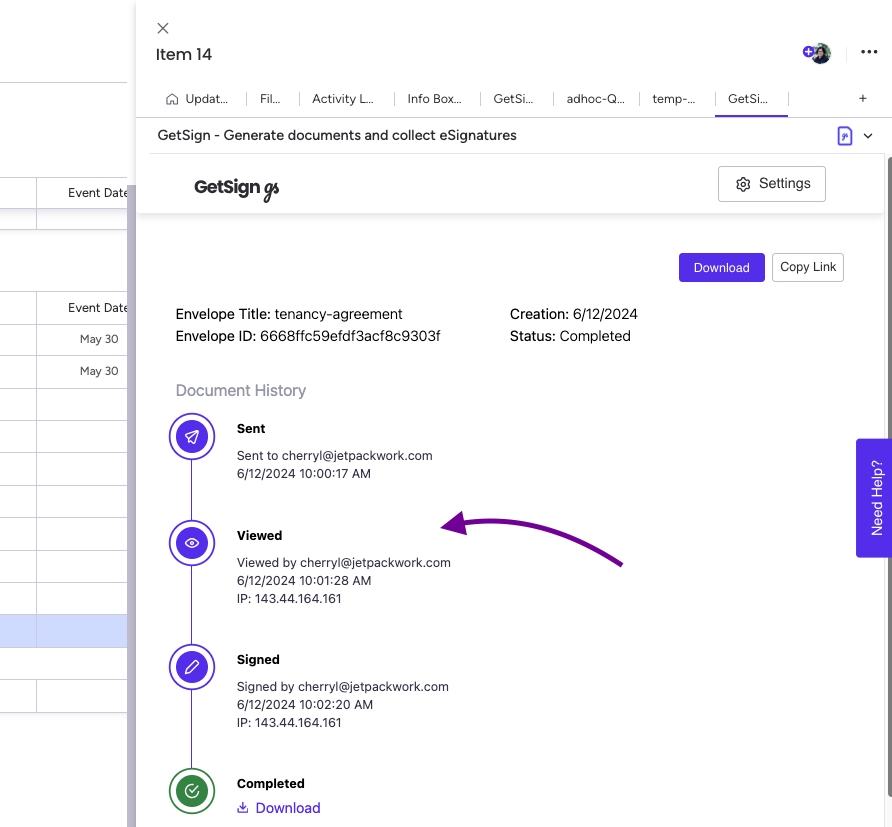
 - Once the receiver views and signs the document, the board and item view status will be updated in real-time.
 Note that the receiver email is defined in the email column of the board that you have mapped.
- Preview: Enables you to view the document.
- Download: Grants you the ability to download the completed document.
- Send: Enables you to dispatch the document to the recipient.
Document Signing
Signed Document
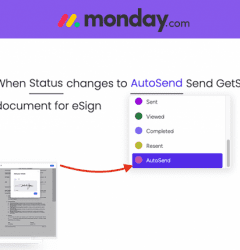
Step 6 – Automation
Automating the sending of documents is easy. Just head to the Integration Center and search for below automation.
When status changes to [***] send GetSign document for eSign
Thus, when the status column transitions to [your specified status], the automation will trigger, and the document will be sent automatically.
This feature only works if you are using “Sign Documents”workflow.